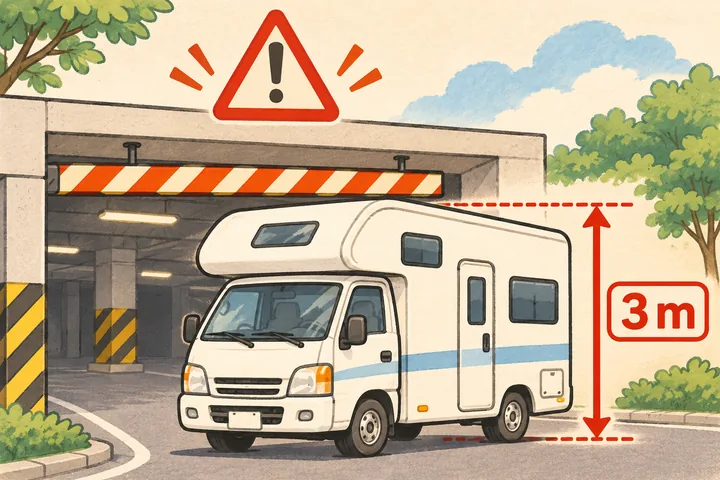
Check bridges, awnings, signs, branches and roofs before driving beneath them. The handover includes an introduction to the vehicle.
Do not enter underground parking. Choose an open-air space with adequate clearance.
A 3 m limit does not mean it is safe to pass: confirm the actual clearance is above the vehicle's highest point with extra room. Never judge clearance simply by whether it looks about one storey high.
Watch entrance canopies and eaves: convenience stores, fuel stations, guesthouses and old buildings may have low structures.
Unknown clearance means stop and choose another route. Never squeeze under a beam or branches.
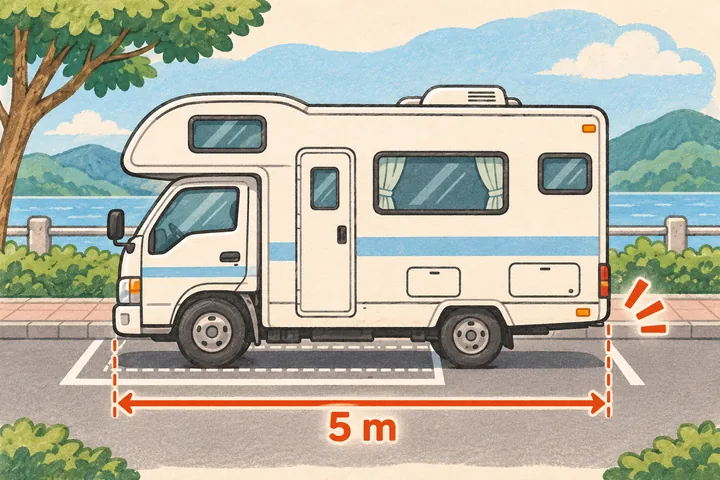
02 | Parking: allow for approximately 5 m of length
Check the entire vehicle, rear overhang, doors and space for other vehicles. A marked bay may be too short.
Make sure the whole vehicle fits: the van is approximately 5 m long. Its rear or attached equipment may extend beyond a short bay. Choose a legal space with enough room.
Prefer the first or last bay in a row: only if the whole vehicle stays within the permitted area and does not block traffic, footpaths, entrances or neighbouring bays.
Stop and check before reversing: look behind the van, at both rear corners, low posts, kerbs and branches. A helper must stand in a safe place to the side, visible to the driver, never directly behind the vehicle.
If you cannot see clearly, stop: move slowly and check again. Mirrors and cameras do not show every blind spot.
The illustration shows the risk of a rear overhang extending beyond a short bay; it is not an example of acceptable parking.
02 | Approx. 5 m long:Allow for the vehicle length
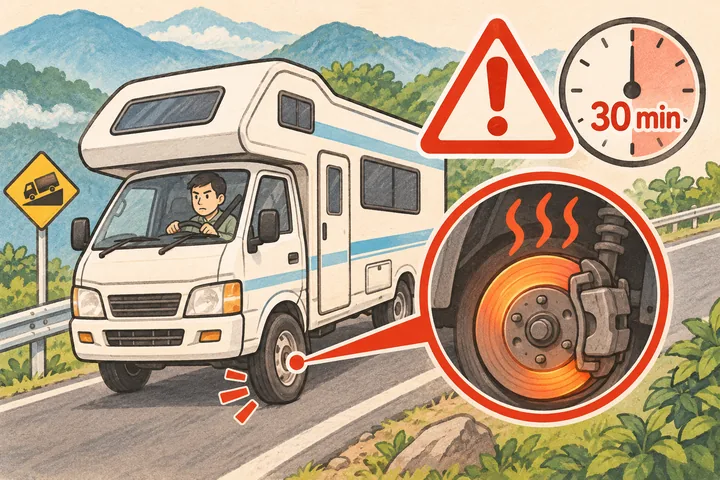
03 | Long mountain descents: a soft brake pedal means stop safely
People, equipment and water add weight. When braking downhill, load shifts towards the front and the front brakes work harder. Friction in the front pads and discs builds heat, which can reduce braking performance. The front-to-rear share varies with the vehicle, load, gradient and deceleration; a fixed percentage cannot establish safety.
⚠ On continuous long mountain descents, stop safely every 30 minutes and rest for at least 10 minutes.
If the brake pedal feels soft, stop safely at once and stop the trip. Do not wait for 30 minutes.“Soft” means the pedal feels softer or spongier than before while driving, or travels further down without the usual slowing response. Do not keep driving, even if there is no burning smell or smoke.
Scheduled breaks are Joy Forest's minimum trip requirement, not a guarantee that 30 minutes of driving is safe or that a 10-minute rest makes the vehicle safe to drive again. Steep gradients, heavy loads or frequent braking may require earlier stops. If the pedal feels soft, braking weakens, or you notice a burning smell or smoke, park safely and contact Joy Forest and roadside assistance immediately. Have a professional inspect the brakes and confirm whether it is safe to continue.
Engine braking | Let the engine help slow the van
Engine braking means releasing the accelerator and selecting a lower gear so the engine's resistance helps control downhill speed. This reduces the heat load and wear on the brake discs and pads from prolonged braking. You must still use the brake pedal as road conditions require.
From D, move the gear lever left: this selects manual shift mode. Check the gear shown on the instrument display. The van still has an automatic transmission; no clutch pedal is needed.
Pull the lever backwards towards − once to go down one gear: for example, if the display shows 4, one downshift selects 3. With the accelerator released, the engine helps slow the van. This is only an example, not a rule to use 3rd gear on every descent.
Move the lever right into D: this restores automatic shifting.
Slow down before the descent, then select a suitable gear one step at a time. Do not suddenly select a very low gear at high speed. Follow the actual gear-lever markings, instrument display, handover demonstration and vehicle manual.
Ask us if the controls are unfamiliar: request a demonstration at handover. If unsure during your trip, park safely and contact us; do not experiment while descending a steep hill. On continuous long mountain descents, you must still stop every 30 minutes and rest for at least 10 minutes. Scheduled breaks do not replace engine braking and proper speed control, or make continuous brake use safe. If the brake pedal feels soft, stop safely at once and stop the trip.
Slow down before the descent: select a suitable low gear as demonstrated at handover and described in the vehicle manual. Use engine braking to help control speed. Never coast in neutral or suddenly select a very low gear at high speed.
Do not keep your foot on the brake: use the brakes as needed alongside engine braking and keep a safe following distance. If you must brake continuously to control speed, reduce speed early and adjust at a safe location.
On continuous long mountain descents, stop every 30 minutes for at least 10 minutes: plan legal, safe stopping places in advance. Never stop on a bend, steep slope or where visibility is poor. Take the scheduled break before the pedal feels soft, and stop earlier if needed. Breaks cannot compensate for riding the brakes.
If the brake pedal feels soft, stop safely at once and stop the trip: do not wait for the next scheduled break. Contact Joy Forest and roadside assistance immediately after parking safely. A soft pedal may involve overheated brake fluid, a hydraulic fault or another problem; do not assume it is only heat. Do not touch hot wheels or brake parts, or pour water on them. Even after a rest of at least 10 minutes and a temporary return to normal pedal feel, do not drive again without professional inspection and clearance.
04 | Turns, passengers and other safety essentials
Slow down, leave extra room, secure people and equipment, and understand your insurance and accident responsibilities.
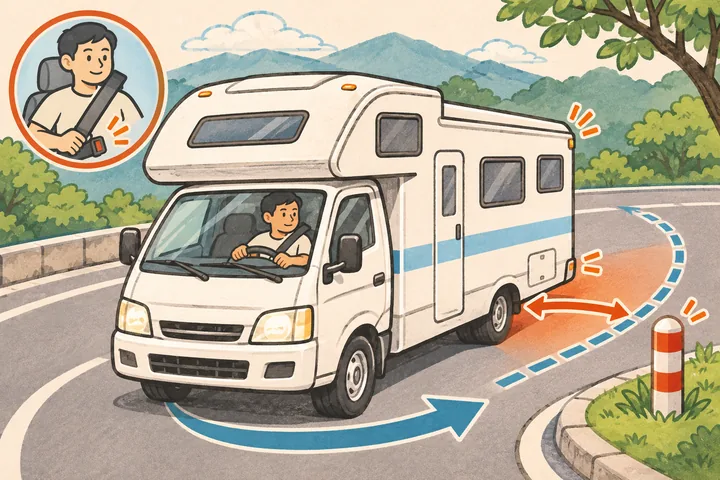
Slow down before turning: allow for the rear wheels cutting inward and the rear body swinging outward. Check both sides, the rear corners, posts and motorcycles. Stop if a narrow lane or passing manoeuvre feels uncertain.
Use designated travel seats and seat belts: nobody may ride in the rear camper living cabin, beds or dining area, or walk around while moving. Use an appropriate child safety seat.
Stow equipment before moving: retract and secure the awning; pack away tables, chairs, extension leads and water hoses. Close doors and cupboards and secure loose items.
Park fully before getting out: choose a safe, level place and follow the handover parking procedure, including P, the parking brake and switching off the engine. Make sure the vehicle cannot roll and check for passing traffic before opening a door.
After an incident, put people first: contact the police as appropriate and notify Joy Forest immediately. Do not settle privately or arrange repairs yourself. Read the insurance, deposit and damage terms below.
Coverage scope, third-party and passenger protection, chassis vs camper box damage, and normal wear vs major damage.
A note for peace of mind
Campervans live outdoors—light branch marks and small surface scuffs on mountain or campsite roads are normal; we don’t charge for that kind of everyday wear.
We focus on clear, serious damage—e.g. roof hitting a stainless awning frame, large scrapes, waterproofing failure and leaks. Those require repair and are charged per actual loss.
With normal careful use you’re usually fine—watch height, rear overhang, and backing space; avoid awnings, low clearance, steel frames, branches, and overhead obstacles.
Insurance essentials before departure
Third-party and passenger excess liability is up to NT$20,000,000 total per accident, with third-party, passenger, driver injury, and Type B vehicle-body cover also carried.
For an ordinary covered vehicle-body collision, a compliant renter's contractual responsibility is capped at NT$10,000 per accident when the authorized-driver, lawful-use, immediate-reporting, and insurer-approval conditions are met.
The current NT$5,000 deposit is settlement security, not the maximum accident liability.
The camper cabin, roof, interior, water/electrical systems, appliances, awning, and camping equipment are not part of the insured automobile body.